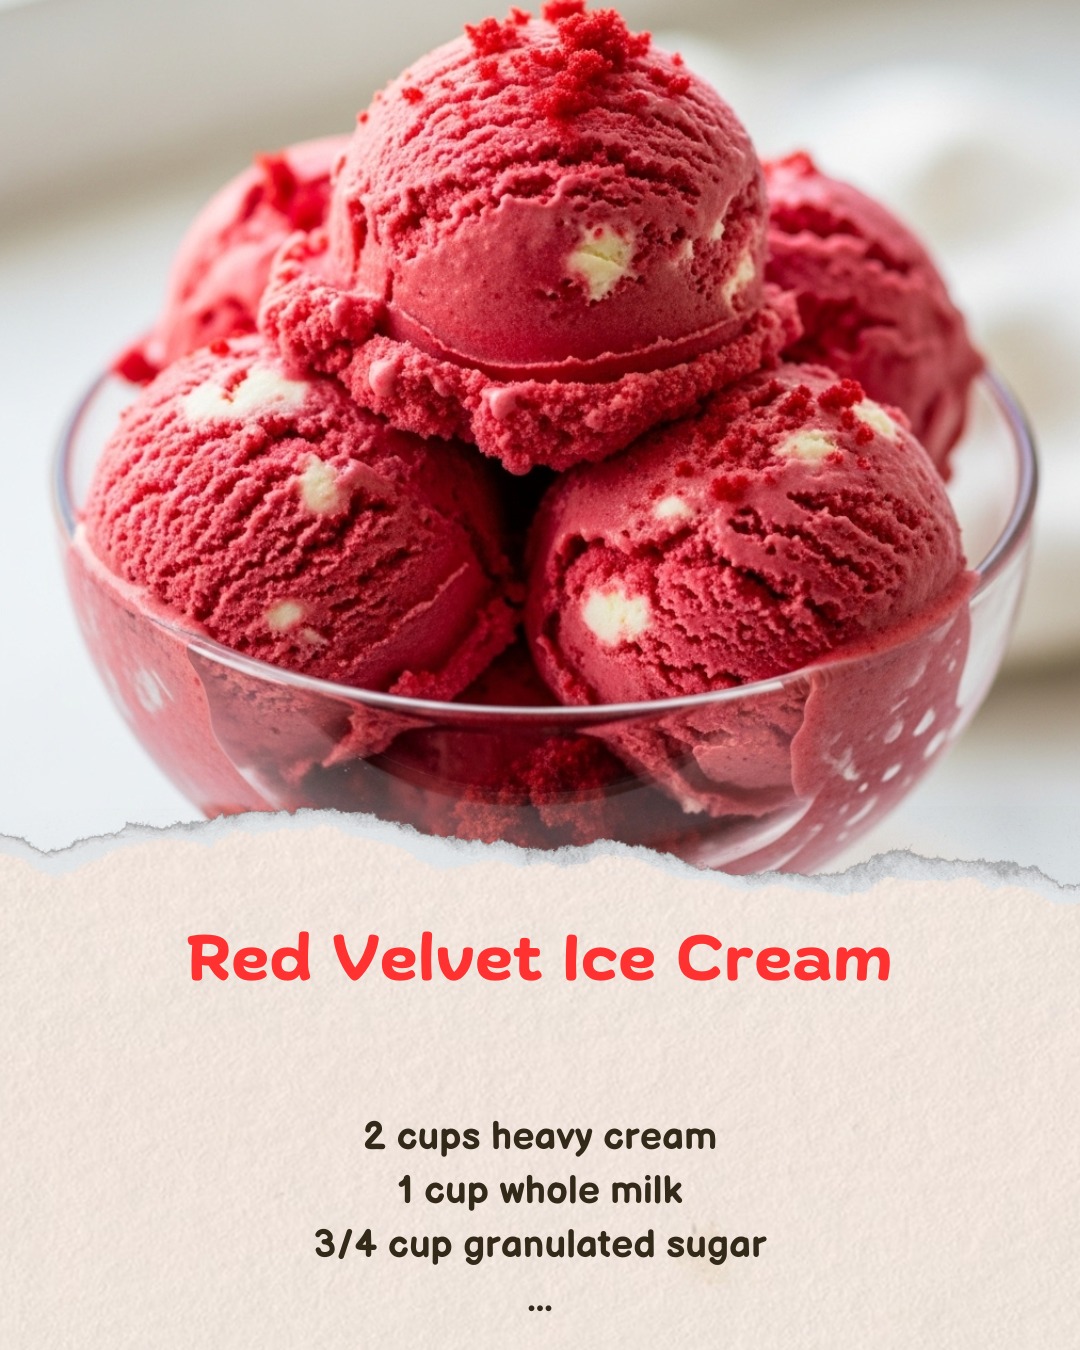
• Red Velvet Ice Cream

    Luscious Red Velvet Ice Cream with Cream Cheese Swirl

    Ingredients:

    2 cups heavy cream

    1 cup whole milk

    3/4 cup granulated sugar

    1 tablespoon unsweetened cocoa powder

    2 teaspoons red food coloring (or natural beet powder)

    1 teaspoon vanilla extract

    1/2 teaspoon apple cider vinegar

    1/2 teaspoon salt

    1/2 cup buttermilk

    4 oz cream cheese, softened

    2 tablespoons powdered sugar

    Directions:

    In a medium saucepan, whisk together the cream, milk, granulated sugar, cocoa powder, and salt over medium heat until the sugar is fully dissolved. Do not boil.

    Remove from heat and stir in red food coloring, vanilla extract, vinegar, and buttermilk. Chill the mixture in the refrigerator for at least 4 hours or overnight.

    While the base chills, beat the softened cream cheese with powdered sugar until smooth. Chill until ready to swirl into ice cream.

    Once the base is fully chilled, churn in an ice cream maker according to the manufacturer’s instructions.

    When the ice cream reaches soft-serve consistency, gently fold in dollops of the cream cheese mixture to create a swirl effect.

    Transfer to a container and freeze for 4–6 hours or until firm. Scoop and serve!

    Prep Time: 20 minutes | Chilling/Freezing Time: 6 hours | Total Time: 6 hours 20 minutes
    Kcal: 310 kcal | Servings: 6 servings

    #redvelvet #icecreamrecipe #homemadeicecream #dessertgoals #frozendessert #valentinesdessert #creamcheeseicecream #icecreamlovers #sweettoothfix #gourmeticecream #churnedicecream #buttermilkrecipes #classicdesserts #colorfuldesserts #indulgenttreats #dessertcreations #southernflavors #velveticecream #swirledicecream #summerdesserts

    Creamy, dreamy, and bursting with rich red velvet flavor! This Red Velvet Ice Cream is everything you love about the cake — now frozen.
    Red Velvet Ice Cream Luscious Red Velvet Ice Cream with Cream Cheese Swirl Ingredients: 2 cups heavy cream 1 cup whole milk 3/4 cup granulated sugar 1 tablespoon unsweetened cocoa powder 2 teaspoons red food coloring (or natural beet powder) 1 teaspoon vanilla extract 1/2 teaspoon apple cider vinegar 1/2 teaspoon salt 1/2 cup buttermilk 4 oz cream cheese, softened 2 tablespoons powdered sugar Directions: In a medium saucepan, whisk together the cream, milk, granulated sugar, cocoa powder, and salt over medium heat until the sugar is fully dissolved. Do not boil. Remove from heat and stir in red food coloring, vanilla extract, vinegar, and buttermilk. Chill the mixture in the refrigerator for at least 4 hours or overnight. While the base chills, beat the softened cream cheese with powdered sugar until smooth. Chill until ready to swirl into ice cream. Once the base is fully chilled, churn in an ice cream maker according to the manufacturer’s instructions. When the ice cream reaches soft-serve consistency, gently fold in dollops of the cream cheese mixture to create a swirl effect. Transfer to a container and freeze for 4–6 hours or until firm. Scoop and serve! Prep Time: 20 minutes | Chilling/Freezing Time: 6 hours | Total Time: 6 hours 20 minutes Kcal: 310 kcal | Servings: 6 servings #redvelvet #icecreamrecipe #homemadeicecream #dessertgoals #frozendessert #valentinesdessert #creamcheeseicecream #icecreamlovers #sweettoothfix #gourmeticecream #churnedicecream #buttermilkrecipes #classicdesserts #colorfuldesserts #indulgenttreats #dessertcreations #southernflavors #velveticecream #swirledicecream #summerdesserts Creamy, dreamy, and bursting with rich red velvet flavor! This Red Velvet Ice Cream is everything you love about the cake — now frozen.
    Like
    Love
    Wow
    · 0 Bình Luận ·0 Chia Sẻ ·46K Xem
  • Butterscotch Sauce

    Classic Butterscotch Sauce – Rich, Buttery & Irresistible

    Ingredients:

    1/2 cup (1 stick) unsalted butter

    1 cup packed brown sugar (light or dark)

    1/2 cup heavy cream

    1/4 teaspoon salt

    1 teaspoon pure vanilla extract

    Directions:

    In a medium saucepan over medium heat, melt the butter.

    Add brown sugar and stir until combined and bubbling, about 2 minutes.

    Slowly pour in the heavy cream while whisking constantly to prevent lumps.

    Bring to a gentle boil and simmer for 4–5 minutes, stirring frequently, until the sauce thickens slightly.

    Remove from heat and stir in salt and vanilla extract.

    Let cool slightly before serving. It will continue to thicken as it cools.

    Store in a sealed jar in the refrigerator for up to 2 weeks. Warm before serving if desired.

    Prep Time: 5 minutes | Cooking Time: 10 minutes | Total Time: 15 minutes
    Kcal: 140 kcal per 2 tbsp | Servings: 12 servings

    #butterscotchsauce #homemadedessertsauce #butterscotchlove #caramelsauce #easysaucerecipe #sweettreats #icecreamtopping #saucysweets #richdesserts #butterybliss #sugarandbutter #dessertdrizzle #homemadebutterscotch #brownbuttersugar #classicdesserts #sweettoothfix #easyhomemadesauce #indulgentsauces #cozydesserts #comfortflavors

    This Butterscotch Sauce is buttery, rich, and dangerously delicious! Pour it on everything from ice cream to waffles.
    Butterscotch Sauce Classic Butterscotch Sauce – Rich, Buttery & Irresistible Ingredients: 1/2 cup (1 stick) unsalted butter 1 cup packed brown sugar (light or dark) 1/2 cup heavy cream 1/4 teaspoon salt 1 teaspoon pure vanilla extract Directions: In a medium saucepan over medium heat, melt the butter. Add brown sugar and stir until combined and bubbling, about 2 minutes. Slowly pour in the heavy cream while whisking constantly to prevent lumps. Bring to a gentle boil and simmer for 4–5 minutes, stirring frequently, until the sauce thickens slightly. Remove from heat and stir in salt and vanilla extract. Let cool slightly before serving. It will continue to thicken as it cools. Store in a sealed jar in the refrigerator for up to 2 weeks. Warm before serving if desired. Prep Time: 5 minutes | Cooking Time: 10 minutes | Total Time: 15 minutes Kcal: 140 kcal per 2 tbsp | Servings: 12 servings #butterscotchsauce #homemadedessertsauce #butterscotchlove #caramelsauce #easysaucerecipe #sweettreats #icecreamtopping #saucysweets #richdesserts #butterybliss #sugarandbutter #dessertdrizzle #homemadebutterscotch #brownbuttersugar #classicdesserts #sweettoothfix #easyhomemadesauce #indulgentsauces #cozydesserts #comfortflavors This Butterscotch Sauce is buttery, rich, and dangerously delicious! Pour it on everything from ice cream to waffles.
    Like
    Love
    Wow
    · 0 Bình Luận ·0 Chia Sẻ ·42K Xem
  • Raspberry Coulis

    Velvety Raspberry Coulis with a Hint of Lemon

    Ingredients:

    2 cups fresh or frozen raspberries

    1/3 cup granulated sugar (adjust to taste)

    1 tablespoon lemon juice

    2 tablespoons water

    Optional: 1 teaspoon cornstarch mixed with 1 tablespoon cold water (for thicker consistency)

    Directions:

    In a small saucepan, combine raspberries, sugar, lemon juice, and water.

    Cook over medium heat for 6–8 minutes, stirring occasionally, until the raspberries break down and release their juices.

    If desired, stir in the cornstarch slurry and cook for another 1–2 minutes until slightly thickened.

    Remove from heat and let cool slightly.

    Strain the mixture through a fine mesh sieve into a bowl to remove seeds, pressing with the back of a spoon.

    Let the coulis cool completely. Store in an airtight container in the refrigerator for up to 5 days.

    Prep Time: 5 minutes | Cooking Time: 10 minutes | Total Time: 15 minutes
    Kcal: 55 kcal per serving | Servings: 6 servings

    #raspberrycoulis #berrysauce #fruitcoulis #dessertsauce #homemadecoulis #summerfruit #easydesserts #fruitpuree #raspberrysauce #sweetandtart #garnishideas #berryrecipes #saucerecipes #freshraspberries #bakingextras #fruittopping #naturalsweets #veganrecipes #glutenfreetreats #classicdessertsauce

    This silky Raspberry Coulis is the perfect finishing touch to cheesecakes, panna cotta, pancakes—you name it! Simple, fresh, and so elegant.
    Raspberry Coulis Velvety Raspberry Coulis with a Hint of Lemon Ingredients: 2 cups fresh or frozen raspberries 1/3 cup granulated sugar (adjust to taste) 1 tablespoon lemon juice 2 tablespoons water Optional: 1 teaspoon cornstarch mixed with 1 tablespoon cold water (for thicker consistency) Directions: In a small saucepan, combine raspberries, sugar, lemon juice, and water. Cook over medium heat for 6–8 minutes, stirring occasionally, until the raspberries break down and release their juices. If desired, stir in the cornstarch slurry and cook for another 1–2 minutes until slightly thickened. Remove from heat and let cool slightly. Strain the mixture through a fine mesh sieve into a bowl to remove seeds, pressing with the back of a spoon. Let the coulis cool completely. Store in an airtight container in the refrigerator for up to 5 days. Prep Time: 5 minutes | Cooking Time: 10 minutes | Total Time: 15 minutes Kcal: 55 kcal per serving | Servings: 6 servings #raspberrycoulis #berrysauce #fruitcoulis #dessertsauce #homemadecoulis #summerfruit #easydesserts #fruitpuree #raspberrysauce #sweetandtart #garnishideas #berryrecipes #saucerecipes #freshraspberries #bakingextras #fruittopping #naturalsweets #veganrecipes #glutenfreetreats #classicdessertsauce This silky Raspberry Coulis is the perfect finishing touch to cheesecakes, panna cotta, pancakes—you name it! Simple, fresh, and so elegant.
    Like
    Love
    Wow
    · 0 Bình Luận ·0 Chia Sẻ ·41K Xem
  • Vanilla Ice Cream

    Classic Creamy Vanilla Bean Ice Cream

    Ingredients:

    2 cups heavy cream

    1 cup whole milk

    3/4 cup granulated sugar

    1 vanilla bean, split and scraped (or 2 teaspoons pure vanilla extract)

    5 large egg yolks

    Pinch of salt

    Directions:

    In a medium saucepan, combine the heavy cream and whole milk. Scrape the seeds from the vanilla bean into the milk mixture and add the pod as well. (If using extract, don’t add it yet.)

    Heat over medium heat until the mixture is hot and steaming but not boiling. Remove from heat and let it steep for 15 minutes.

    In a mixing bowl, whisk together the egg yolks, sugar, and salt until the mixture is pale and thick.

    Slowly pour about 1/2 cup of the warm milk into the egg yolk mixture while whisking to temper the eggs.

    Pour the tempered yolk mixture back into the saucepan with the remaining milk and cream.

    Cook over medium heat, stirring constantly, until the custard thickens and coats the back of a spoon (170–175°F / 77–80°C). Do not let it boil.

    Remove from heat, strain through a fine-mesh sieve into a clean bowl, and discard the vanilla pod. If using vanilla extract, stir it in now.

    Cool to room temperature, then cover and refrigerate for at least 4 hours or overnight.

    Churn the chilled base in an ice cream maker according to the manufacturer’s instructions.

    Transfer to an airtight container and freeze for at least 4 hours before serving.

    Prep Time: 20 minutes | Cooking Time: 10 minutes | Total Time: 6 hours 30 minutes (includes chilling and freezing)

    Kcal: 290 kcal | Servings: 6 servings

    #vanillaicecream #classicdessert #homemadeicecream #vanillabean #custardicecream #frozentreats #icecreamlover #summerdesserts #vanillarecipe #homemadedesserts #dessertideas #icecreamrecipe #creamyicecream #richflavor #easyicecream #frozencustard #vanillaflavored #sweettooth #scoopofjoy #icecreamlove

    Pure, creamy, and classic —this Vanilla Bean Ice Cream is the real deal. Homemade never tasted this smooth!
    Vanilla Ice Cream Classic Creamy Vanilla Bean Ice Cream Ingredients: 2 cups heavy cream 1 cup whole milk 3/4 cup granulated sugar 1 vanilla bean, split and scraped (or 2 teaspoons pure vanilla extract) 5 large egg yolks Pinch of salt Directions: In a medium saucepan, combine the heavy cream and whole milk. Scrape the seeds from the vanilla bean into the milk mixture and add the pod as well. (If using extract, don’t add it yet.) Heat over medium heat until the mixture is hot and steaming but not boiling. Remove from heat and let it steep for 15 minutes. In a mixing bowl, whisk together the egg yolks, sugar, and salt until the mixture is pale and thick. Slowly pour about 1/2 cup of the warm milk into the egg yolk mixture while whisking to temper the eggs. Pour the tempered yolk mixture back into the saucepan with the remaining milk and cream. Cook over medium heat, stirring constantly, until the custard thickens and coats the back of a spoon (170–175°F / 77–80°C). Do not let it boil. Remove from heat, strain through a fine-mesh sieve into a clean bowl, and discard the vanilla pod. If using vanilla extract, stir it in now. Cool to room temperature, then cover and refrigerate for at least 4 hours or overnight. Churn the chilled base in an ice cream maker according to the manufacturer’s instructions. Transfer to an airtight container and freeze for at least 4 hours before serving. Prep Time: 20 minutes | Cooking Time: 10 minutes | Total Time: 6 hours 30 minutes (includes chilling and freezing) Kcal: 290 kcal | Servings: 6 servings #vanillaicecream #classicdessert #homemadeicecream #vanillabean #custardicecream #frozentreats #icecreamlover #summerdesserts #vanillarecipe #homemadedesserts #dessertideas #icecreamrecipe #creamyicecream #richflavor #easyicecream #frozencustard #vanillaflavored #sweettooth #scoopofjoy #icecreamlove Pure, creamy, and classic —this Vanilla Bean Ice Cream is the real deal. Homemade never tasted this smooth!
    Like
    Love
    Wow
    · 0 Bình Luận ·0 Chia Sẻ ·33K Xem
  • Homemade Ice Cream

    Classic Creamy Homemade Vanilla Ice Cream

    Ingredients:

    2 cups heavy cream

    1 cup whole milk

    3/4 cup granulated sugar

    1 tablespoon pure vanilla extract

    Pinch of salt

    Directions:

    In a large mixing bowl, whisk together the heavy cream, milk, sugar, vanilla extract, and salt until the sugar is completely dissolved.

    Cover and refrigerate the mixture for at least 2–4 hours, or overnight for best results.

    Pour the chilled mixture into an ice cream maker and churn according to the manufacturer’s instructions (usually 20–25 minutes).

    Once churned to a soft-serve consistency, transfer the ice cream to an airtight container.

    Freeze for at least 2–3 hours to firm up before scooping and serving.

    Prep Time: 10 minutes | Chill Time: 2–4 hours | Churn + Freeze Time: 3 hours | Total Time: 6–7 hours
    Kcal: 270 kcal per serving | Servings: 6 servings

    #homemadeicecream #vanillaicecream #classicdesserts #easyicecream #summerdessert #churnedicecream #frozentreats #icecreamrecipe #dessertlover #icecreamlovers #sweettooth #creamyicecream #vanillalovers #frozendelight #icecreamatnight #simpleingredients #homemadetreats #summervibes #frozendessert #dessertfromscratch

    Nothing beats a scoop of Homemade Ice Cream made with real vanilla, cream, and love! It’s smooth, rich, and easy to make at home.
    Homemade Ice Cream Classic Creamy Homemade Vanilla Ice Cream Ingredients: 2 cups heavy cream 1 cup whole milk 3/4 cup granulated sugar 1 tablespoon pure vanilla extract Pinch of salt Directions: In a large mixing bowl, whisk together the heavy cream, milk, sugar, vanilla extract, and salt until the sugar is completely dissolved. Cover and refrigerate the mixture for at least 2–4 hours, or overnight for best results. Pour the chilled mixture into an ice cream maker and churn according to the manufacturer’s instructions (usually 20–25 minutes). Once churned to a soft-serve consistency, transfer the ice cream to an airtight container. Freeze for at least 2–3 hours to firm up before scooping and serving. Prep Time: 10 minutes | Chill Time: 2–4 hours | Churn + Freeze Time: 3 hours | Total Time: 6–7 hours Kcal: 270 kcal per serving | Servings: 6 servings #homemadeicecream #vanillaicecream #classicdesserts #easyicecream #summerdessert #churnedicecream #frozentreats #icecreamrecipe #dessertlover #icecreamlovers #sweettooth #creamyicecream #vanillalovers #frozendelight #icecreamatnight #simpleingredients #homemadetreats #summervibes #frozendessert #dessertfromscratch Nothing beats a scoop of Homemade Ice Cream made with real vanilla, cream, and love! It’s smooth, rich, and easy to make at home.
    Like
    Love
    Wow
    · 0 Bình Luận ·0 Chia Sẻ ·32K Xem
Kết Quả Khác