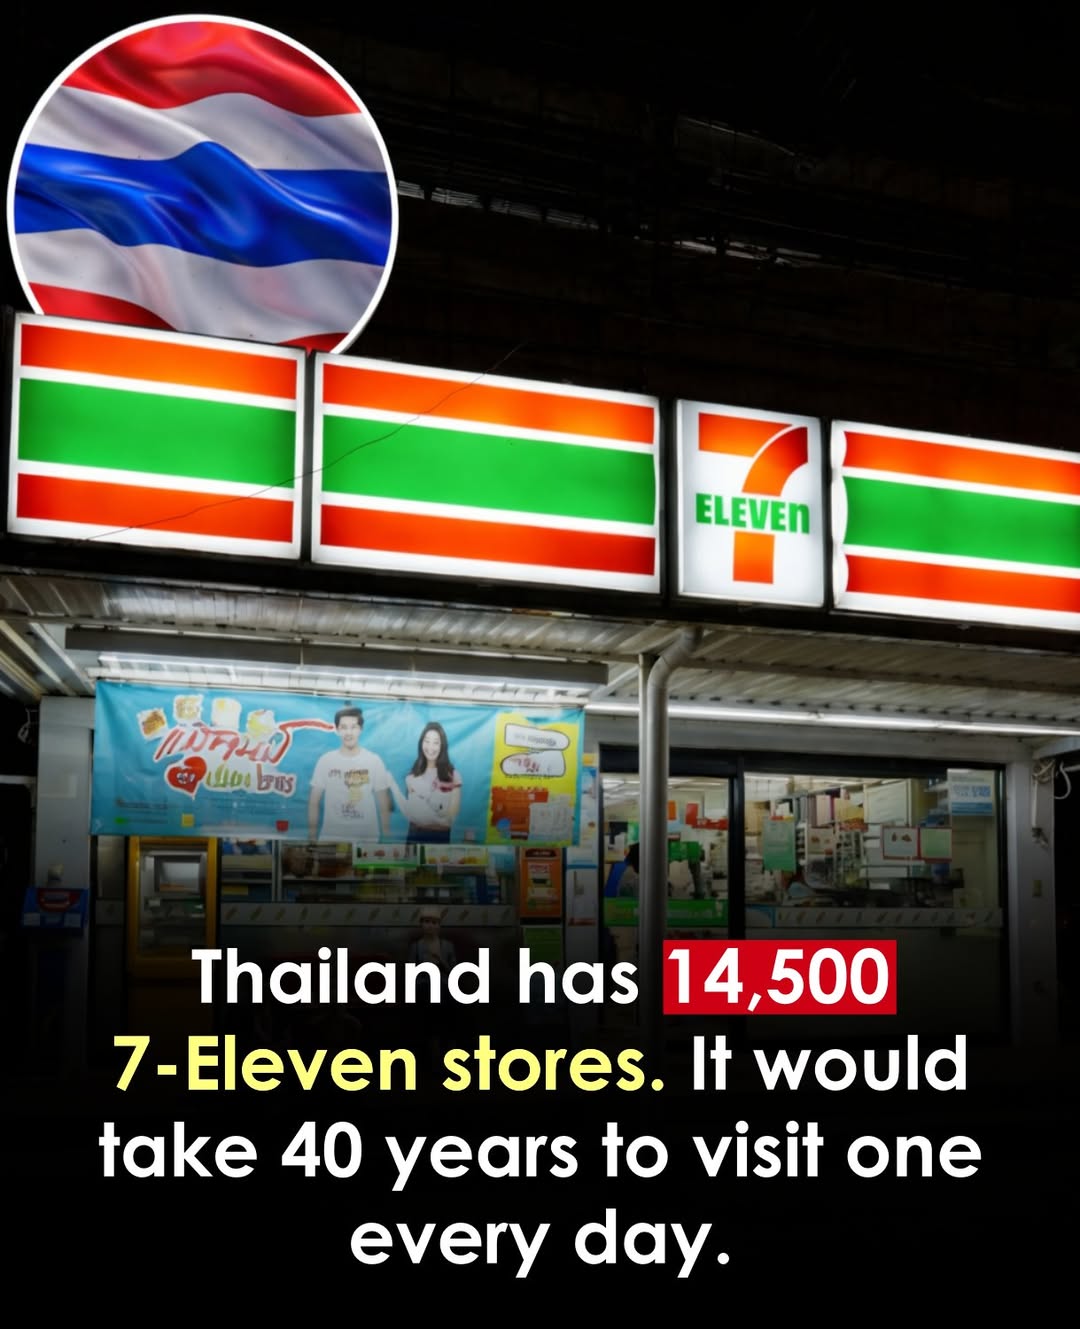
• If you're looking for the perfect keto snack that’s crispy, cheesy, and oh-so-delicious, you’re in for a treat! These Keto Puffed Cheese Snacks are easy to make and satisfy your cheesy cravings in no time. #KetoSnacks #CheeseLovers #LowCarb #HealthyEating #EasyRecipes

    Ingredients:
    - 1 cup shredded cheddar cheese
    - 1 cup shredded mozzarella cheese
    - 1 teaspoon garlic powder

    Directions:
    1. Preheat your oven to 400°F (200°C).
    2. In a mixing bowl, combine the shredded cheddar and mozzarella cheeses along with the garlic powder. Stir until all the ingredients are well mixed.
    3. Line a baking sheet with parchment paper to prevent sticking.
    4. Scoop small portions of the cheese mixture onto the prepared baking sheet, ensuring there's enough space between each mound.
    5. Bake in the preheated oven for 5-7 minutes, or until they are beautifully golden and puffed up.
    6. Once done, remove from the oven and allow to cool slightly on the baking sheet before serving.

    Nutritional values (per serving):
    - Serving Size: 1 snack
    - Calories: 100
    - Fat: 8g
    - Protein: 7g
    - Carbohydrates: 1g
    - Fiber: 0g

    Enjoy these tasty bites as a midday snack or alongside your favorite dips! They're sure to become a staple in your keto lifestyle!
    If you're looking for the perfect keto snack that’s crispy, cheesy, and oh-so-delicious, you’re in for a treat! These Keto Puffed Cheese Snacks are easy to make and satisfy your cheesy cravings in no time. #KetoSnacks #CheeseLovers #LowCarb #HealthyEating #EasyRecipes Ingredients: - 1 cup shredded cheddar cheese - 1 cup shredded mozzarella cheese - 1 teaspoon garlic powder Directions: 1. Preheat your oven to 400°F (200°C). 2. In a mixing bowl, combine the shredded cheddar and mozzarella cheeses along with the garlic powder. Stir until all the ingredients are well mixed. 3. Line a baking sheet with parchment paper to prevent sticking. 4. Scoop small portions of the cheese mixture onto the prepared baking sheet, ensuring there's enough space between each mound. 5. Bake in the preheated oven for 5-7 minutes, or until they are beautifully golden and puffed up. 6. Once done, remove from the oven and allow to cool slightly on the baking sheet before serving. Nutritional values (per serving): - Serving Size: 1 snack - Calories: 100 - Fat: 8g - Protein: 7g - Carbohydrates: 1g - Fiber: 0g Enjoy these tasty bites as a midday snack or alongside your favorite dips! They're sure to become a staple in your keto lifestyle!
    Like
    Love
    Wow
    · 0 Comentários ·0 Compartilhamentos ·36KB Visualizações
  • Looking for a guilt-free treat that satisfies your sweet tooth? These Healthy Snickers Protein Bars are packed with goodness and packed with protein!

    Ingredients:
    - 1 1⁄2 cups almond flour
    - 1⁄3 cup coconut flour
    - 1⁄2 cup peanut butter
    - 1⁄2 cup maple syrup
    - 1⁄2 cup whey vanilla protein powder
    - 1⁄4 cup unsweetened almond milk
    - 1 cup peanut butter (for caramel)
    - 1⁄4 cup pitted dates
    - 2 tbsp maple syrup (for caramel)
    - 1 tbsp coconut sugar
    - 4 tbsp unsweetened almond milk (for caramel)
    - 1 tsp vanilla extract
    - 1⁄2 tsp kosher salt
    - 1⁄2 cup roasted peanuts
    - 1 1⁄2 to 2 cups dark chocolate, melted

    Directions:
    1. Start by lining a 9"X9" baking pan with parchment paper for easy removal later.
    2. In a mixing bowl, combine all the ingredients for the 'Nougat Base': almond flour, coconut flour, peanut butter, maple syrup, whey protein powder, and almond milk. Mix until well combined.
    3. Once combined, press the nougat mixture into the prepared pan evenly. Pop it into the freezer for about 30 minutes to set.
    4. While that’s chilling, let’s whip up our ‘Caramel Layer’! Blend together the peanut butter, pitted dates, maple syrup, coconut sugar, almond milk, vanilla extract, and kosher salt until the mixture is smooth and creamy.
    5. After the nougat has firmed up, spread the caramel layer evenly over it and sprinkle the roasted peanuts on top. Return to the freezer for another 30 minutes.
    6. Finally, melt the dark chocolate and dip each bar into the chocolate, ensuring they’re fully coated. Place the coated bars on a lined baking sheet.
    7. Freeze the bars again for about 30 minutes before cutting them into your desired sizes and serving. Enjoy your healthy treat!

    Nutrition Facts (Per Bar):
    - Calories: 200
    - Protein: 10g
    - Carbs: 14g
    - Fat: 12g
    - Fiber: 2g

    Serving Size: 1 bar (makes approximately 12 bars)

    #HealthySnickers #ProteinBars #GuiltFreeTreats #SnackSmart #Yum
    Looking for a guilt-free treat that satisfies your sweet tooth? These Healthy Snickers Protein Bars are packed with goodness and packed with protein! Ingredients: - 1 1⁄2 cups almond flour - 1⁄3 cup coconut flour - 1⁄2 cup peanut butter - 1⁄2 cup maple syrup - 1⁄2 cup whey vanilla protein powder - 1⁄4 cup unsweetened almond milk - 1 cup peanut butter (for caramel) - 1⁄4 cup pitted dates - 2 tbsp maple syrup (for caramel) - 1 tbsp coconut sugar - 4 tbsp unsweetened almond milk (for caramel) - 1 tsp vanilla extract - 1⁄2 tsp kosher salt - 1⁄2 cup roasted peanuts - 1 1⁄2 to 2 cups dark chocolate, melted Directions: 1. Start by lining a 9"X9" baking pan with parchment paper for easy removal later. 2. In a mixing bowl, combine all the ingredients for the 'Nougat Base': almond flour, coconut flour, peanut butter, maple syrup, whey protein powder, and almond milk. Mix until well combined. 3. Once combined, press the nougat mixture into the prepared pan evenly. Pop it into the freezer for about 30 minutes to set. 4. While that’s chilling, let’s whip up our ‘Caramel Layer’! Blend together the peanut butter, pitted dates, maple syrup, coconut sugar, almond milk, vanilla extract, and kosher salt until the mixture is smooth and creamy. 5. After the nougat has firmed up, spread the caramel layer evenly over it and sprinkle the roasted peanuts on top. Return to the freezer for another 30 minutes. 6. Finally, melt the dark chocolate and dip each bar into the chocolate, ensuring they’re fully coated. Place the coated bars on a lined baking sheet. 7. Freeze the bars again for about 30 minutes before cutting them into your desired sizes and serving. Enjoy your healthy treat! Nutrition Facts (Per Bar): - Calories: 200 - Protein: 10g - Carbs: 14g - Fat: 12g - Fiber: 2g Serving Size: 1 bar (makes approximately 12 bars) #HealthySnickers #ProteinBars #GuiltFreeTreats #SnackSmart #Yum
    Like
    Love
    Wow
    · 0 Comentários ·0 Compartilhamentos ·36KB Visualizações
  • Looking for a delicious low-carb snack that's bursting with flavor? Try these Keto Taco-Seasoned Chicken Jalapeno Roll-Ups for a savory treat!

    Ingredients:
    - 1 1/2 cups Mexican Blend Shredded Cheese
    - 2 cups Shredded Chicken
    - 1 tbsp Taco Seasoning
    - 1 tbsp Olive Oil
    - 1 Jalapeno, deseeded and finely chopped
    - 2 tsp Minced Garlic
    - 4 ounces Cream Cheese, softened
    - 2 tbsp Green Onions, for garnish

    Directions:
    1. Preheat your oven to 400°F (200°C) and line a large baking sheet with parchment paper.

    2. Scoop the shredded cheese into 6 equally sized circles on the baking sheet. Bake for about 8 minutes, or until the edges start to brown.

    3. While the cheese is baking, heat the olive oil in a skillet over medium-high heat. Toss in the shredded chicken, taco seasoning, and minced garlic, sautéing until everything is heated through and well combined.

    4. In a mixing bowl, combine the sautéed chicken mixture with the softened cream cheese and chopped jalapenos. Stir it all together until nicely blended.

    5. Once the cheese is out of the oven and slightly cooled, take a line of the cheesy filling and place it down the center of each cheese circle. Gently roll the cheese around the filling, then let them cool until they harden and crisp up a bit before serving.

    Nutritional Values (per serving):
    - Serving Size: 1 roll-up
    - Calories: 250
    - Fat: 18g
    - Protein: 20g
    - Net Carbs: 2g

    Enjoy these crunchy, cheesy delights as a tasty snack or a party appetizer! Trust me; you'll be coming back for more.

    #KetoRecipes #LowCarbSnacks #TacoTuesday #HealthyEating #DeliciousBites
    Looking for a delicious low-carb snack that's bursting with flavor? Try these Keto Taco-Seasoned Chicken Jalapeno Roll-Ups for a savory treat! Ingredients: - 1 1/2 cups Mexican Blend Shredded Cheese - 2 cups Shredded Chicken - 1 tbsp Taco Seasoning - 1 tbsp Olive Oil - 1 Jalapeno, deseeded and finely chopped - 2 tsp Minced Garlic - 4 ounces Cream Cheese, softened - 2 tbsp Green Onions, for garnish Directions: 1. Preheat your oven to 400°F (200°C) and line a large baking sheet with parchment paper. 2. Scoop the shredded cheese into 6 equally sized circles on the baking sheet. Bake for about 8 minutes, or until the edges start to brown. 3. While the cheese is baking, heat the olive oil in a skillet over medium-high heat. Toss in the shredded chicken, taco seasoning, and minced garlic, sautéing until everything is heated through and well combined. 4. In a mixing bowl, combine the sautéed chicken mixture with the softened cream cheese and chopped jalapenos. Stir it all together until nicely blended. 5. Once the cheese is out of the oven and slightly cooled, take a line of the cheesy filling and place it down the center of each cheese circle. Gently roll the cheese around the filling, then let them cool until they harden and crisp up a bit before serving. Nutritional Values (per serving): - Serving Size: 1 roll-up - Calories: 250 - Fat: 18g - Protein: 20g - Net Carbs: 2g Enjoy these crunchy, cheesy delights as a tasty snack or a party appetizer! Trust me; you'll be coming back for more. #KetoRecipes #LowCarbSnacks #TacoTuesday #HealthyEating #DeliciousBites
    Like
    Love
    Wow
    · 0 Comentários ·0 Compartilhamentos ·35KB Visualizações
  • Air Fryer Buffalo Chicken Egg Rolls

    Crispy Air-Fried Buffalo Chicken Egg Rolls with Ranch Dip

    Ingredients:

    2 cups cooked chicken breast, shredded

    ½ cup buffalo wing sauce

    1 cup shredded mozzarella cheese

    ½ cup crumbled blue cheese (optional)

    ¼ cup finely chopped green onions

    1 teaspoon garlic powder

    12 egg roll wrappers

    Olive oil spray or cooking spray

    Ranch or blue cheese dressing, for serving

    Directions:

    In a large bowl, mix the shredded chicken, buffalo sauce, mozzarella, blue cheese (if using), green onions, and garlic powder. Stir until evenly combined.

    Place one egg roll wrapper on a clean surface with a corner facing you (like a diamond). Spoon about 2 tablespoons of the chicken mixture onto the center.

    Fold the bottom corner over the filling, then fold in the sides and roll tightly, sealing the tip with a dab of water.

    Repeat with remaining wrappers and filling.

    Preheat your air fryer to 375°F (190°C) for 3 minutes.

    Lightly spray the egg rolls with cooking spray and arrange them in a single layer in the air fryer basket. Do not overcrowd.

    Air fry for 8–10 minutes, flipping halfway, until golden and crispy.

    Serve hot with ranch or blue cheese dressing for dipping.

    Prep Time: 15 minutes | Cooking Time: 10 minutes | Total Time: 25 minutes
    Kcal: 180 kcal per roll | Servings: 12 rolls

    #buffalochicken #airfryerrecipes #eggrolls #crispybites #gamefoods #spicysnacks #airfriedgoodness #easyappetizer #chickenrecipes #ranchdipping #partyfoods #buffalosauce #cheeselovers #airfryerideas #spicyflavors #airfryersnacks #homemadeeggrolls #weeknightappetizer #airfryerfun #flavorblast

    Craving a spicy snack? These Buffalo Chicken Egg Rolls are crispy, golden, and made in the air fryer! Perfect for parties or game night!
    Air Fryer Buffalo Chicken Egg Rolls Crispy Air-Fried Buffalo Chicken Egg Rolls with Ranch Dip Ingredients: 2 cups cooked chicken breast, shredded ½ cup buffalo wing sauce 1 cup shredded mozzarella cheese ½ cup crumbled blue cheese (optional) ¼ cup finely chopped green onions 1 teaspoon garlic powder 12 egg roll wrappers Olive oil spray or cooking spray Ranch or blue cheese dressing, for serving Directions: In a large bowl, mix the shredded chicken, buffalo sauce, mozzarella, blue cheese (if using), green onions, and garlic powder. Stir until evenly combined. Place one egg roll wrapper on a clean surface with a corner facing you (like a diamond). Spoon about 2 tablespoons of the chicken mixture onto the center. Fold the bottom corner over the filling, then fold in the sides and roll tightly, sealing the tip with a dab of water. Repeat with remaining wrappers and filling. Preheat your air fryer to 375°F (190°C) for 3 minutes. Lightly spray the egg rolls with cooking spray and arrange them in a single layer in the air fryer basket. Do not overcrowd. Air fry for 8–10 minutes, flipping halfway, until golden and crispy. Serve hot with ranch or blue cheese dressing for dipping. Prep Time: 15 minutes | Cooking Time: 10 minutes | Total Time: 25 minutes Kcal: 180 kcal per roll | Servings: 12 rolls #buffalochicken #airfryerrecipes #eggrolls #crispybites #gamefoods #spicysnacks #airfriedgoodness #easyappetizer #chickenrecipes #ranchdipping #partyfoods #buffalosauce #cheeselovers #airfryerideas #spicyflavors #airfryersnacks #homemadeeggrolls #weeknightappetizer #airfryerfun #flavorblast Craving a spicy snack? These Buffalo Chicken Egg Rolls are crispy, golden, and made in the air fryer! Perfect for parties or game night!
    Like
    Love
    Wow
    · 0 Comentários ·0 Compartilhamentos ·38KB Visualizações
  • Sweet and Spicy Filipino Fishball Sauce

    Manila-Style Street Food Fishball Sauce with Garlic and Heat

    Ingredients:

    ½ cup brown sugar

    2 tablespoons soy sauce

    1 tablespoon vinegar

    1 tablespoon banana ketchup (or regular ketchup)

    1 tablespoon cornstarch

    1 cup water

    4 cloves garlic, minced

    1 small red chili, chopped (optional for spice)

    Salt and pepper, to taste

    Directions:

    In a small saucepan, combine brown sugar, soy sauce, vinegar, and ketchup. Stir until sugar begins to dissolve.

    In a separate bowl, dissolve cornstarch in water. Slowly pour into the saucepan while stirring to avoid lumps.

    Add minced garlic and chili (if using).

    Bring the mixture to a gentle boil over medium heat, stirring constantly until thickened to your liking (usually 3–5 minutes).

    Season with salt and pepper to taste.

    Serve warm with fried fishballs, kikiam, kwek-kwek, or your favorite street food snacks.

    Prep Time: 5 minutes | Cooking Time: 5 minutes | Total Time: 10 minutes
    Kcal: 70 kcal (per 2 tablespoons) | Servings: About 10 servings

    #filipinofood #fishball #streetfood #asianstreetfood #sweetspicysauce #dippingsauce #saucerecipe #quickrecipes #asianflavors #manilastreetfood #fishballsauce #foodcartstyle #snacktime #garlicsauce #saucemagic #easyfilipinofood #pinoysnacks #spicyfood #comfortsnack #meriendaideas

    Take your fishballs to the next level with this sticky, garlicky, sweet and spicy Filipino-style sauce!
    Sweet and Spicy Filipino Fishball Sauce Manila-Style Street Food Fishball Sauce with Garlic and Heat Ingredients: ½ cup brown sugar 2 tablespoons soy sauce 1 tablespoon vinegar 1 tablespoon banana ketchup (or regular ketchup) 1 tablespoon cornstarch 1 cup water 4 cloves garlic, minced 1 small red chili, chopped (optional for spice) Salt and pepper, to taste Directions: In a small saucepan, combine brown sugar, soy sauce, vinegar, and ketchup. Stir until sugar begins to dissolve. In a separate bowl, dissolve cornstarch in water. Slowly pour into the saucepan while stirring to avoid lumps. Add minced garlic and chili (if using). Bring the mixture to a gentle boil over medium heat, stirring constantly until thickened to your liking (usually 3–5 minutes). Season with salt and pepper to taste. Serve warm with fried fishballs, kikiam, kwek-kwek, or your favorite street food snacks. Prep Time: 5 minutes | Cooking Time: 5 minutes | Total Time: 10 minutes Kcal: 70 kcal (per 2 tablespoons) | Servings: About 10 servings #filipinofood #fishball #streetfood #asianstreetfood #sweetspicysauce #dippingsauce #saucerecipe #quickrecipes #asianflavors #manilastreetfood #fishballsauce #foodcartstyle #snacktime #garlicsauce #saucemagic #easyfilipinofood #pinoysnacks #spicyfood #comfortsnack #meriendaideas Take your fishballs to the next level with this sticky, garlicky, sweet and spicy Filipino-style sauce!
    Like
    Love
    Wow
    · 0 Comentários ·0 Compartilhamentos ·35KB Visualizações
Páginas impulsionada