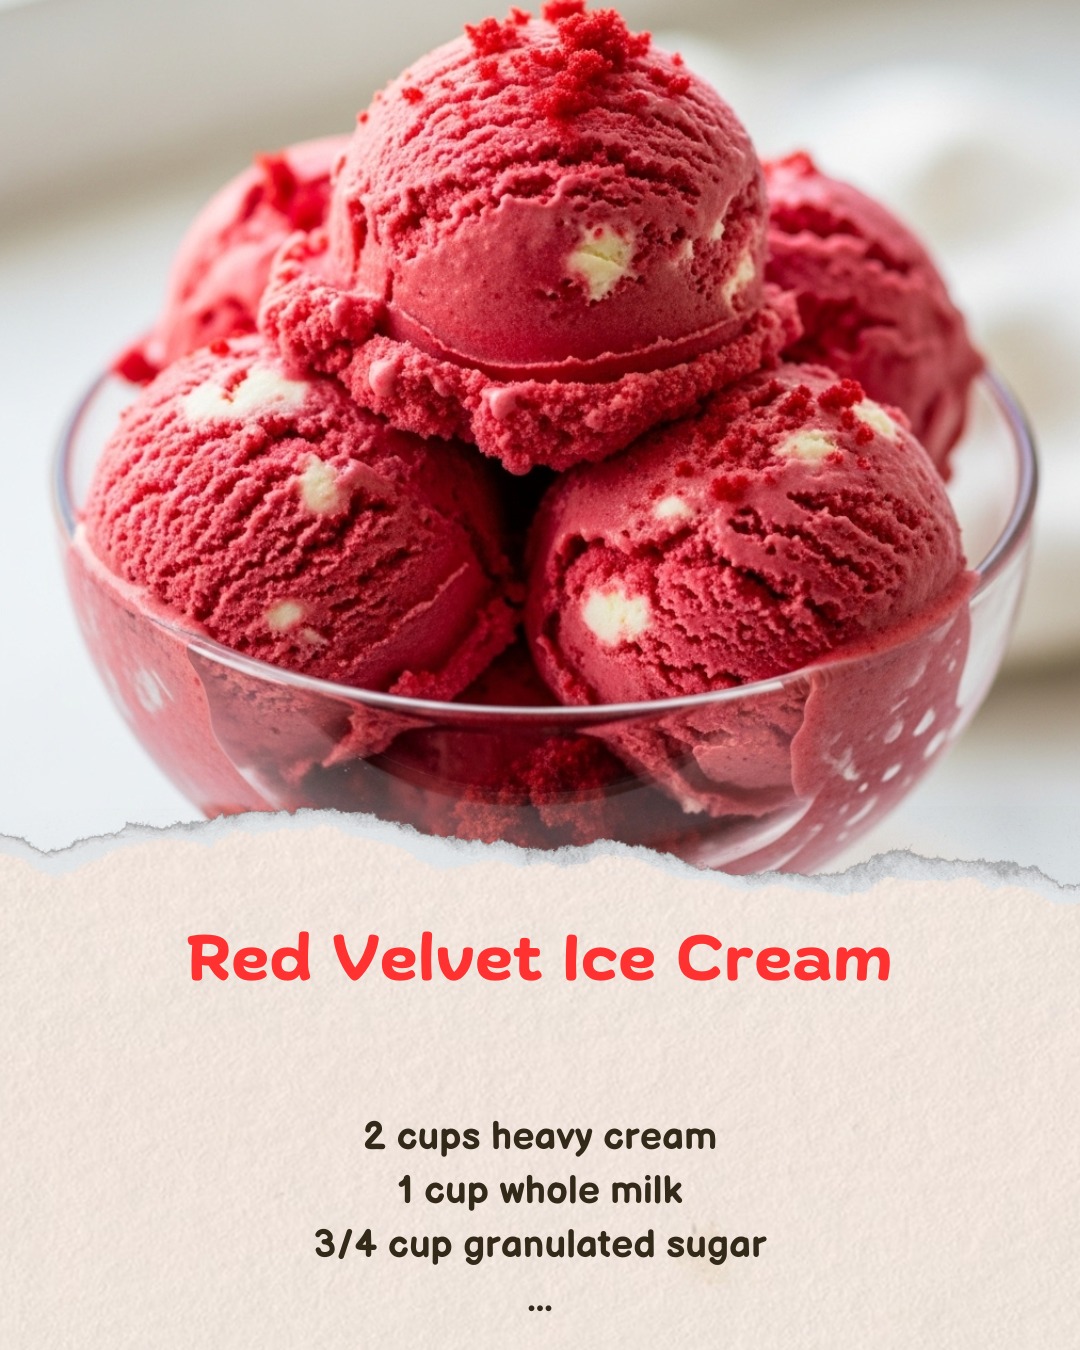
• Delight in these scrumptious Keto Pop Tart Bars! They’re a sweet treat that won’t derail your low-carb lifestyle. #KetoDessert #LowCarb #HealthyTreats #SugarFree #DessertGoals

    Ingredients:
    - 2 1⁄2 cups almond flour
    - 1⁄3 cup erythritol sweetener
    - 2 tablespoons coconut flour
    - 1⁄4 teaspoon salt
    - 1⁄2 cup butter, melted
    - 1⁄2 teaspoon vanilla extract
    - 3⁄4 cup sugar-free raspberry jam
    - 2⁄3 cup Swerve Confectioners
    - 2 to 3 tablespoons heavy whipping cream
    - 2 teaspoons keto sprinkles

    Directions:
    1. Preheat your oven to 350°F (175°C). Line an 8×8 inch metal baking pan with parchment paper, making sure the edges hang over for easy lifting later on.
    2. In a large bowl, combine the almond flour, erythritol sweetener, coconut flour, and salt. Whisk it all together until it's well blended.
    3. Pour in the melted butter and vanilla extract, mixing until the dough begins to clump together nicely.
    4. Take a little over half of the dough and press it into the bottom of your prepared pan. Bake it in the oven for about 10 minutes.
    5. Once baked, allow the crust to cool in the pan for 10 minutes. Then, spread the sugar-free raspberry jam over the cooled base evenly.
    6. Crumble the remaining dough over the jam, covering it as completely as you can. A light press with your hands will help even out the top.
    7. Bake again for 20 to 25 minutes until the topping turns a lovely golden brown.
    8. Once out of the oven, let it cool completely and then refrigerate for at least 1 hour to really firm up.
    9. In a medium bowl, whisk together the Swerve Confectioners and 2 tablespoons of heavy cream until smooth. If necessary, add more cream or a touch of water to reach your desired glaze consistency.
    10. Spread this delightful glaze over the chilled bars, finishing with a sprinkle of keto sprinkles on top.
    11. Pop them back into the fridge for another 30 minutes to set that glaze.
    12. Finally, use the overhanging parchment to lift the bars out of the pan, cut into 16 tasty squares, and enjoy!

    Nutrition Facts (per serving - 1 bar):
    - Calories: 180
    - Protein: 3g
    - Fat: 16g
    - Carbohydrates: 6g (Net Carbs: 3g)
    - Fiber: 3g

    Serving Size: 1 bar

    Now you’ve got a delicious, guilt-free treat perfect for those keto cravings. Enjoy every bite!
    Delight in these scrumptious Keto Pop Tart Bars! They’re a sweet treat that won’t derail your low-carb lifestyle. #KetoDessert #LowCarb #HealthyTreats #SugarFree #DessertGoals Ingredients: - 2 1⁄2 cups almond flour - 1⁄3 cup erythritol sweetener - 2 tablespoons coconut flour - 1⁄4 teaspoon salt - 1⁄2 cup butter, melted - 1⁄2 teaspoon vanilla extract - 3⁄4 cup sugar-free raspberry jam - 2⁄3 cup Swerve Confectioners - 2 to 3 tablespoons heavy whipping cream - 2 teaspoons keto sprinkles Directions: 1. Preheat your oven to 350°F (175°C). Line an 8×8 inch metal baking pan with parchment paper, making sure the edges hang over for easy lifting later on. 2. In a large bowl, combine the almond flour, erythritol sweetener, coconut flour, and salt. Whisk it all together until it's well blended. 3. Pour in the melted butter and vanilla extract, mixing until the dough begins to clump together nicely. 4. Take a little over half of the dough and press it into the bottom of your prepared pan. Bake it in the oven for about 10 minutes. 5. Once baked, allow the crust to cool in the pan for 10 minutes. Then, spread the sugar-free raspberry jam over the cooled base evenly. 6. Crumble the remaining dough over the jam, covering it as completely as you can. A light press with your hands will help even out the top. 7. Bake again for 20 to 25 minutes until the topping turns a lovely golden brown. 8. Once out of the oven, let it cool completely and then refrigerate for at least 1 hour to really firm up. 9. In a medium bowl, whisk together the Swerve Confectioners and 2 tablespoons of heavy cream until smooth. If necessary, add more cream or a touch of water to reach your desired glaze consistency. 10. Spread this delightful glaze over the chilled bars, finishing with a sprinkle of keto sprinkles on top. 11. Pop them back into the fridge for another 30 minutes to set that glaze. 12. Finally, use the overhanging parchment to lift the bars out of the pan, cut into 16 tasty squares, and enjoy! Nutrition Facts (per serving - 1 bar): - Calories: 180 - Protein: 3g - Fat: 16g - Carbohydrates: 6g (Net Carbs: 3g) - Fiber: 3g Serving Size: 1 bar Now you’ve got a delicious, guilt-free treat perfect for those keto cravings. Enjoy every bite!
    Like
    Love
    Wow
    · 0 Comentários ·0 Compartilhamentos ·34K Visualizações
  • Looking for a delightful treat that’s both creamy and indulgent? This Chilled Whipped Chocolate Cream is the perfect combination of rich chocolate flavor and light, airy texture. Perfect for a quick dessert or a topping for your favorite sweets!

    **Ingredients:**
    - 1 cup heavy cream
    - 1 tbsp cocoa powder
    - 1 tbsp peanut butter (optional)
    - Stevia to taste

    **Directions:**
    1. In a mixing bowl, whip the heavy cream until it forms firm peaks.
    2. Gently fold in the cocoa powder and peanut butter (if you're feeling adventurous!).
    3. Sweeten with Stevia according to your taste preference – a little goes a long way!
    4. Chill the mixture in the fridge for about 30 minutes before serving to enhance the flavors.

    **Nutritional Values (per serving):**
    - Serving Size: 1/4 cup
    - Calories: 150
    - Fat: 14g
    - Carbohydrates: 3g
    - Protein: 1g
    - Sugar: 1g (from Stevia)

    Treat yourself to this heavenly dessert! It's not just delicious but also guilt-free. Enjoy every luscious spoonful!

    #ChilledChocolateCream #DessertGoals #WhippedCreamDelight #LowSugarTreats #ChocolateLovers
    Looking for a delightful treat that’s both creamy and indulgent? This Chilled Whipped Chocolate Cream is the perfect combination of rich chocolate flavor and light, airy texture. Perfect for a quick dessert or a topping for your favorite sweets! **Ingredients:** - 1 cup heavy cream - 1 tbsp cocoa powder - 1 tbsp peanut butter (optional) - Stevia to taste **Directions:** 1. In a mixing bowl, whip the heavy cream until it forms firm peaks. 2. Gently fold in the cocoa powder and peanut butter (if you're feeling adventurous!). 3. Sweeten with Stevia according to your taste preference – a little goes a long way! 4. Chill the mixture in the fridge for about 30 minutes before serving to enhance the flavors. **Nutritional Values (per serving):** - Serving Size: 1/4 cup - Calories: 150 - Fat: 14g - Carbohydrates: 3g - Protein: 1g - Sugar: 1g (from Stevia) Treat yourself to this heavenly dessert! It's not just delicious but also guilt-free. Enjoy every luscious spoonful! #ChilledChocolateCream #DessertGoals #WhippedCreamDelight #LowSugarTreats #ChocolateLovers
    Like
    Love
    Wow
    · 0 Comentários ·0 Compartilhamentos ·31K Visualizações
  • Peanut Butter Cup Ice Cream

    Creamy Peanut Butter Cup Explosion Ice Cream

    Ingredients:

    2 cups heavy cream

    1 cup whole milk

    3/4 cup granulated sugar

    1/2 cup creamy peanut butter

    1 tsp vanilla extract

    Pinch of salt

    1 1/2 cups chopped peanut butter cups (Reese’s or similar)

    Directions:

    In a mixing bowl, whisk together the heavy cream, milk, sugar, peanut butter, vanilla extract, and salt until smooth and fully combined.

    Cover and refrigerate the mixture for at least 2 hours, or overnight for richer flavor.

    Once chilled, pour into your ice cream maker and churn according to the manufacturer’s instructions (typically 20–25 minutes).

    In the last 5 minutes of churning, add the chopped peanut butter cups so they mix evenly into the ice cream.

    Transfer the ice cream to a freezer-safe container and freeze for at least 4 hours or until firm.

    Scoop and serve with extra peanut butter cup chunks on top if desired.

    Prep Time: 10 minutes | Chilling Time: 2 hours | Churning Time: 25 minutes | Freezing Time: 4 hours | Total Time: 6 hours 35 minutes

    Kcal: 360 kcal | Servings: 8 servings

    #icecreamaddict #peanutbutterlove #homemadedesserts #icecreamcravings #reeseicecream #frozentreats #sweetindulgence #peanutbuttercups #icecreamparty #creamyicecream #easyicecreamrecipe #homemadesweets #dessertideas #icecreamlover #nobakedessert #icecreamtime #scoopszn #decadentdesserts #coldtreats #dessertgoals

    Craving something creamy, nutty, and chocolatey? This Peanut Butter Cup Ice Cream is an indulgent dream in every scoop!
    Peanut Butter Cup Ice Cream Creamy Peanut Butter Cup Explosion Ice Cream Ingredients: 2 cups heavy cream 1 cup whole milk 3/4 cup granulated sugar 1/2 cup creamy peanut butter 1 tsp vanilla extract Pinch of salt 1 1/2 cups chopped peanut butter cups (Reese’s or similar) Directions: In a mixing bowl, whisk together the heavy cream, milk, sugar, peanut butter, vanilla extract, and salt until smooth and fully combined. Cover and refrigerate the mixture for at least 2 hours, or overnight for richer flavor. Once chilled, pour into your ice cream maker and churn according to the manufacturer’s instructions (typically 20–25 minutes). In the last 5 minutes of churning, add the chopped peanut butter cups so they mix evenly into the ice cream. Transfer the ice cream to a freezer-safe container and freeze for at least 4 hours or until firm. Scoop and serve with extra peanut butter cup chunks on top if desired. Prep Time: 10 minutes | Chilling Time: 2 hours | Churning Time: 25 minutes | Freezing Time: 4 hours | Total Time: 6 hours 35 minutes Kcal: 360 kcal | Servings: 8 servings #icecreamaddict #peanutbutterlove #homemadedesserts #icecreamcravings #reeseicecream #frozentreats #sweetindulgence #peanutbuttercups #icecreamparty #creamyicecream #easyicecreamrecipe #homemadesweets #dessertideas #icecreamlover #nobakedessert #icecreamtime #scoopszn #decadentdesserts #coldtreats #dessertgoals Craving something creamy, nutty, and chocolatey? This Peanut Butter Cup Ice Cream is an indulgent dream in every scoop!
    0 Comentários ·0 Compartilhamentos ·29K Visualizações
  • Looking for a refreshing treat to beat the heat?

    Blueberry-Lime Ice Cream

    Ingredients:
    - 2 cups fresh blueberries
    - 1 cup coconut milk
    - 1/2 cup honey or maple syrup
    - 1/4 cup lime juice
    - Zest of 1 lime
    - 1 teaspoon vanilla extract
    - Pinch of salt

    Preparation Steps:
    1. In a blender, combine the blueberries, coconut milk, honey or maple syrup, lime juice, lime zest, vanilla extract, and salt.
    2. Blend until smooth and well combined.
    3. Taste and adjust sweetness if necessary.
    4. Pour the mixture into an ice cream maker and churn according to the manufacturer's instructions.
    5. Transfer the churned ice cream to a container and freeze for at least 4 hours to firm up.
    6. Scoop and serve, garnishing with extra blueberries or lime zest if desired.

    Prep Time: 15 mins | Cooking Time: 0 mins | Total Time: 4 hrs 15 mins
    Calories: 150 kcal per serving | Servings: 6 servings

    Suggested Pairings: Serve with a sprinkle of granola or alongside fresh fruit for an extra crunch!

    #blueberryicecream #summertreats #dessertgoals
    Looking for a refreshing treat to beat the heat? Blueberry-Lime Ice Cream Ingredients: - 2 cups fresh blueberries - 1 cup coconut milk - 1/2 cup honey or maple syrup - 1/4 cup lime juice - Zest of 1 lime - 1 teaspoon vanilla extract - Pinch of salt Preparation Steps: 1. In a blender, combine the blueberries, coconut milk, honey or maple syrup, lime juice, lime zest, vanilla extract, and salt. 2. Blend until smooth and well combined. 3. Taste and adjust sweetness if necessary. 4. Pour the mixture into an ice cream maker and churn according to the manufacturer's instructions. 5. Transfer the churned ice cream to a container and freeze for at least 4 hours to firm up. 6. Scoop and serve, garnishing with extra blueberries or lime zest if desired. Prep Time: 15 mins | Cooking Time: 0 mins | Total Time: 4 hrs 15 mins Calories: 150 kcal per serving | Servings: 6 servings Suggested Pairings: Serve with a sprinkle of granola or alongside fresh fruit for an extra crunch! #blueberryicecream #summertreats #dessertgoals
    0 Comentários ·0 Compartilhamentos ·24K Visualizações
  • Raspberry Ripple Ice Cream

    Creamy Vanilla Ice Cream with Luscious Raspberry Swirl

    Ingredients:

    2 cups heavy cream

    1 cup whole milk

    3/4 cup granulated sugar

    1 tablespoon vanilla extract

    1 1/2 cups fresh or frozen raspberries

    3 tablespoons sugar (for the ripple)

    1 teaspoon lemon juice

    Directions:

    In a medium saucepan, combine raspberries, 3 tablespoons sugar, and lemon juice. Simmer over medium heat for 8–10 minutes, stirring occasionally, until thickened. Press through a fine mesh strainer to remove seeds. Chill the raspberry sauce completely.

    In a large bowl, whisk together heavy cream, milk, sugar, and vanilla extract until sugar is dissolved.

    Pour the cream mixture into your ice cream maker and churn according to the manufacturer’s instructions (usually 20–25 minutes) until it reaches a soft-serve consistency.

    Transfer half of the churned ice cream into a loaf pan. Spoon half of the raspberry sauce over it and swirl gently with a knife. Repeat with the remaining ice cream and sauce.

    Cover with plastic wrap and freeze for at least 4 hours, or until firm.

    Scoop and serve with fresh raspberries if desired.

    Prep Time: 20 minutes | Churning Time: 25 minutes | Freeze Time: 4 hours | Total Time: 4 hours 45 minutes
    Kcal: 290 kcal | Servings: 8 servings

    #raspberryicecream #homemadeicecream #rippleicecream #summerdessert #frozentreats #icecreamlover #creamydesserts #berriesandcream #dessertgoals #vanillaripple #freshraspberries #sweettoothfix #noartificialflavors #homemadegoodness #icecreamseason #summerindulgence #easyicecream #fruityswirl #freezerdessert #churnedicecream

    Sweet, creamy, and bursting with raspberry goodness! This Raspberry Ripple Ice Cream is your homemade summer scoop dream
    Raspberry Ripple Ice Cream Creamy Vanilla Ice Cream with Luscious Raspberry Swirl Ingredients: 2 cups heavy cream 1 cup whole milk 3/4 cup granulated sugar 1 tablespoon vanilla extract 1 1/2 cups fresh or frozen raspberries 3 tablespoons sugar (for the ripple) 1 teaspoon lemon juice Directions: In a medium saucepan, combine raspberries, 3 tablespoons sugar, and lemon juice. Simmer over medium heat for 8–10 minutes, stirring occasionally, until thickened. Press through a fine mesh strainer to remove seeds. Chill the raspberry sauce completely. In a large bowl, whisk together heavy cream, milk, sugar, and vanilla extract until sugar is dissolved. Pour the cream mixture into your ice cream maker and churn according to the manufacturer’s instructions (usually 20–25 minutes) until it reaches a soft-serve consistency. Transfer half of the churned ice cream into a loaf pan. Spoon half of the raspberry sauce over it and swirl gently with a knife. Repeat with the remaining ice cream and sauce. Cover with plastic wrap and freeze for at least 4 hours, or until firm. Scoop and serve with fresh raspberries if desired. Prep Time: 20 minutes | Churning Time: 25 minutes | Freeze Time: 4 hours | Total Time: 4 hours 45 minutes Kcal: 290 kcal | Servings: 8 servings #raspberryicecream #homemadeicecream #rippleicecream #summerdessert #frozentreats #icecreamlover #creamydesserts #berriesandcream #dessertgoals #vanillaripple #freshraspberries #sweettoothfix #noartificialflavors #homemadegoodness #icecreamseason #summerindulgence #easyicecream #fruityswirl #freezerdessert #churnedicecream 🍨 Sweet, creamy, and bursting with raspberry goodness! This Raspberry Ripple Ice Cream is your homemade summer scoop dream 🍓☀️
    0 Comentários ·0 Compartilhamentos ·36K Visualizações
Páginas Impulsionadas